Introduction:
Switching between UDP and TCP can be essential for optimizing network performance based on specific requirements. Here’s a guide on how to switch the protocol on Android.
Step 1: Access the Main Menu:
Navigate to the main menu; located at the top left side of the interface.
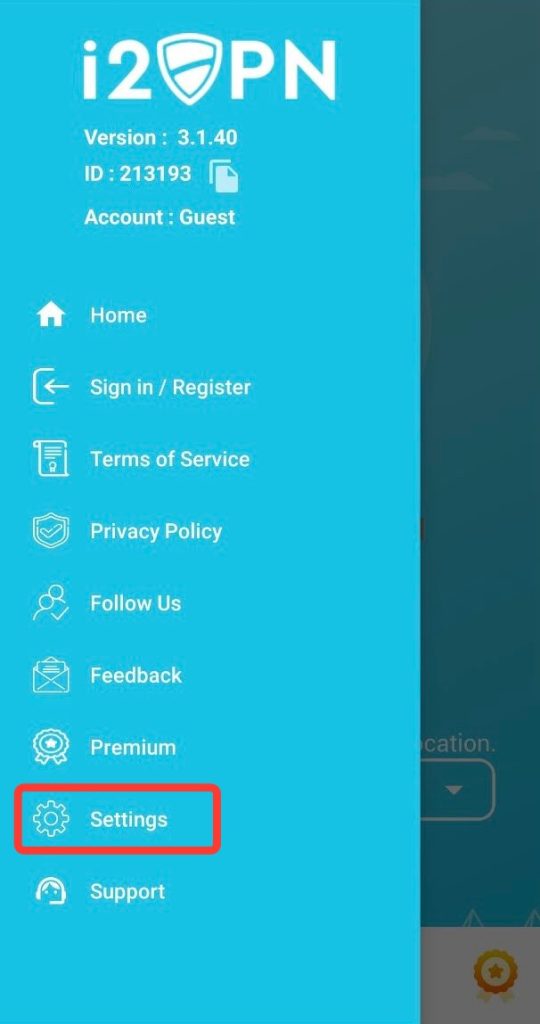
Step 2: Click on Settings:
Within the main menu, look for the “Settings” option. Click on the “Settings” option to access the configuration menu.
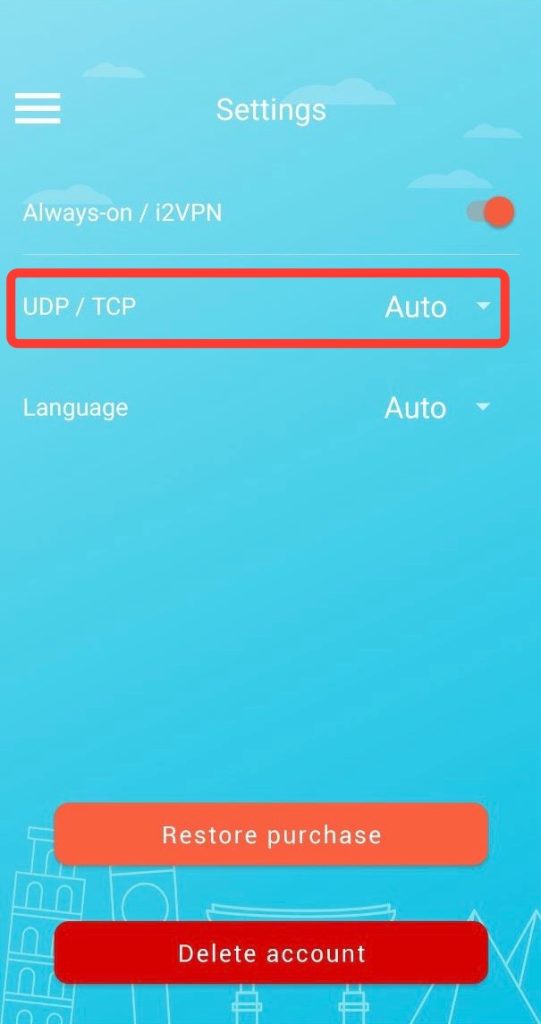
Step 3: Choose Between UDP and TCP:
Once you’re in the settings, you should see an option to select the desired protocol. It might be presented as a dropdown menu or radio buttons. Choose between UDP or TCP based on your specific needs.
UDP (User Datagram Protocol):
- Ideal for real-time applications, streaming, and gaming.
- Faster but less reliable than TCP.
TCP (Transmission Control Protocol):
- Provides reliable, ordered, and error-checked delivery of data.
- Suitable for applications where data integrity is crucial.
Step 4: Restart the Application or Device (If Necessary):
In some cases, the changes to the protocol settings may require a restart of the application.
Conclusion:
By following these steps, you can easily switch between UDP and TCP protocols based on your specific requirements. Remember that the choice between UDP and TCP depends on the nature of the applications or services you are using, so choose accordingly to optimize your network experience.